Monday, November 30, 2015

Bicol Express


Bicol Express
Bicolanos are known for their love of hot and spicy food. Bicol express is surely an authentic Bicol dish using local ingredients around the region sili or chilli and with the cream of coconut milk is a superb combination, delicious and mouth watering taste that one can consume a lot of rice to offset the spiciness of chilli. 

The name of this dish was taken after an express train that travels from Manila to Bicol long time ago. With modernization the train is already outdated and long gone, people nowadays travel with airconditioned buses straight to Bicol but the dish still kept its name and an insignia of a truly Bicolano, a reminder of the history that will linger on to the next generation to come.

The dish became famous because of the amount of chilli added in the recipe. I am not a Bicolano but I've learned to love the dish. Chilli is available all year round, in wet markets or supermarkets. I has some medicinal values too. It contains medical compound called capsaicin and its co-compounds being employed in the preparation of ointments, rubs and tinctures for their astringent, counter-irritant and analgesic properties. This formulation has been used in treatment of arthritic pain, post-herpetic, neuropathic pain, sore muscles etc. http://www.nutrition-and-you.com
sgforum.com
Ingredients:
1 regular size onion
3 cloves garlic
3 tablespoons oil for saute
1 kilo pork or chicken 
1cup of red and green small chilli (siling labuyo)
3/4 cup 2nd (puree) extraction of coconut cream 
1/2 cup of 1st (puree) extraction of coconut milk
Method:
  • Saute the garlic and onion with 3 tablespoons oil.
  • Add the meat, pork or chicken cut in bite sizes.
  • Add the 2nd extraction of coconut cream, let boil in medium heat until meat is tender.
  • Add the chilli 1 cup or more to your preference then add salt to taste, let boil in low heat to reduce water.
  • Lastly add the 1st extraction of coconut milk, let boil until it becomes thick like a sauce.
  • Serve and enjoy your hot and spicy dish with white rice.
Note: 1 or 2 mature coconut is sufficient for the puree extraction.


Have fun and enjoy this authentic Bicol recipe.

Ciao!

Ginisang Sayote


Photo courtesy:www.gourmetsleuth.com

Chayote also known as Mirliton in the US is a pear shaped light green in the gourd family. It is a perennial vine that climbs on support by clinging with tenacious tendrils, requires well drained moist soil and long warm growing season to flourish. At their natural habitat, mirlitons run along fences, over shrubs and even on straight up trees. In the cultivated farms, however the crop is supported with strong trellis.

Chayote pears will mature and ready for harvest after about 30 days of pollination. Each plant may yield up to 150 fruits in season. The fruit has thin, pale green color skin and several shallow vertical furrows on the surface. Some types have spiky or fuzzy surface while others have smooth skin. Inside it's pale white flesh surrounds a central cream white seed ovule. It features crunchy texture and mild sweet taste that may be comparable to butternut squash or pumpkin.

Health Benefits of Chayote:
Like pumpkin it has very low in calories,16 calories per 100g and no saturated fats and cholesterol. A rich source of dietary fibers, anti oxidants, vitamins and minerals. It is good for weight reduction and dietary programs. Good sourcce of  B complex vitamins and folates. Folates are important for cell division and DNA synthesis when taken before and during pregnancy, this vitamin can help prevent neural tube defects in the newborn babies. Chayote also provides moderate levels of potassium. 100g of fresh fruit contain 125 mg or 2.5% of recommended daily requirements of this electrolyte. Also chayotes contain small levels of aglycone flavonoid poly-phenolic antioxidants such as apigenin and luteolin. These compounds help scavenge harmful oxygen-derived free radicals and reactive oxygen species (ROS) from the body that play a role in cancer, aging and various disease processes. Fresh chayotes are adequate sources of anti-oxidant vitamin C. It provides about 7.7 mg or 13% of RDA per 100g. In addition they are also good in B-complex group of vitamins like thiamin, pyridoxine, riboflavin and minerals like iron, manganese, phosphorus, zinc and copper.
www.nutrition-and-you.com


In the Philippines, it is available all year round. Chayote is a kind of vegetable that is versatile because it can be added to a number of dishes like chopsuey, dinuguan, tinola and a lot more because of its bland taste. 

I miss chayote, I used to cook this ginisang chayote or sayote when I was in high school. My mom's way of teaching me and my siblings how to cook is placing all ingredients on the table then she leaves for work. So when we wake up, we already know what to prepare for lunch as everything we needed are already set up. 

What I hate in sayote is the wax type liquid that sticks to the skin and sometimes itchy or tingly when peeled. You need to wash your hands thoroughly with soap and cold water to remove it or better yet use gloves as the juice from the peelings are so irritating. 


Sauteed chayote is an inexpensive dish and is easy to prepare. Here's how:
Ginisang sayote ingredients:
1 regular size onion
2 regular size tomato
2 cloves garlic


1 maggie bouillon
3 tablespoons oil
3 tablespoons soya sauce
1/4 kilo pork or chicken meat
1/4 kilo shrimp, peeled and juice extracted
3 regular size sayote
salt and pepper to taste

Method:
  • Peel and wash your sayote and cut in strips (julienne).
  • You can massage the sayote with salt to soften it up then squeeze out the juice or saute it straightforward do not add water in this case as the sayote will be watery.
  • Saute the garlic, onion and tomatoes then add maggie bouillon and soy sauce. 
  • Add 1/2 cup of water if it is dry especially when water is squeezed out.
  • Add the meat like pork or chicken until tender then add the shrimp and let simmer on medium to low heat.
For saute
  • Add soy sauce and the julienned sayote let boil until chayote are tender but not soggy or over cooked, mix once or twice then remove from heat. Serve and enjoy...


Buko Pandan Recipe


I'll be so sad if I will not include this buko pandan in my list of recipes. It has become so famous in our circle of friends especially during our potluck activities. I prefer having buko pandan for dessert over cakes and other sweets. The chewiness of the gulaman that lingers on the tongue and the creaminess and sweetness of flavors combined is what make this salad so delicious. Fresh pandan leaves are so aromatic and it's so good to be used, if you
have access to it.

The gulaman itself must have the right amount of water when cooked, this is what makes this recipe a success. I must add nata de coco too and the tiny sago and I must say that sago absorbs water so be careful, you don't want to end up with a dry buko pandan. 

Gulaman is an important ingredient in this recipe. What is gulaman? The gulaman is derived from processed dried seaweed called agar. Agar in its natural state is the structural carbohydrates of the algae. It has lots of uses as a stabilizer and thickener to a lot of food, pharmaceutical products, make up and a lot more.  It comes in packages, bars or powdered form melted in hot water then mixed in food or left to cool just like in this recipe to solidify adding sugar, color and flavorings to be more exciting to see and eat. There are plenty of desserts that is out today using this agar or gulaman with vibrant and exciting colors.

In addition to gulaman, the natural flavor of fresh grated buko adds up to the yumminess of this recipe. This is the best choice if available than the bottled coconut sport. Of course you complete this recipe with all purpose cream, evaporated milk and condensed milk. All the goodness are all in so, what are you waiting for.

Ingredients:
1 packet gulaman
1 bottle of nata de coco (optional)
1/4 kilo fresh buko meat or 2 bottles of coconut sport
1/2 cup tiny sago
2 cans cream
1 big can of evaporated milk
1 big can of  condensed milk
Method:
  • Empty 1 sachet  of Mr gulaman in 4 cups of water stirring constantly, boil for 2 minutes and transfer to a flat container and let sit until solid.
  • Boil 3 cups of water then put sago boil for 5 minutes then turn off heat leaving sago in the hot pot until well cooked, set aside.
  • Cut cooled gulaman in bite sizes and transfer to a salad bowl.
  • Mix in nata de coco, sago, buko or coconut sport, cream, evaporated milk and condensed milk.
  • Adjust taste, add white sugar if desired.
  • Let cool overnight in refrigerator. Serve and enjoy.


Monday, November 23, 2015

Orange Chicken


We love this...


Orange Chicken from Panda express has become our choice when we go hungry during our travels to America. Asian cuisine is still our preference when it comes to dining. My daughter love it and ask if I could make it. So I was challenged to try it, anyway the ingredients are just simple. It became one of our sought after dish so at least we can have it anytime at the comfort of our home. This is a Chinese recipe with a crispy fried chicken bites covered in a sweet tangy sauce. I prefer to use chicken breast so it's easy to cut up in small pieces and without bones, the preparation is a little bit lengthy but if you love to cook like me then it will be easy just follow these simple steps. I marinate the chicken meat to make sure the meat softens and absorbs the flavor of the orange. This recipe originally come from Hunan province in China and I think has evolved in many places and is now famous in America more than in China where it came from.

Marinade:
1/2 kl chicken breast cut in small pieces
1 cup orange juice
2 tablespoons lemon juice

1 cup flour to coat the chicken pieces
salt and pepper to taste
3 cups oil for frying

Sauce:

3 cloves garlic, minced
1 teaspoon ginger,minced
1 1/2 cups water
2 tablespoons fresh squeezed lemon juice
1/4 cup orange juice
1/4 cup freshly squeezed orange juice
2 tablespoons of orange zest
1/4 cup brown sugar, adjust to your liking
2 tablespoons vinegar
2 tablespoons corn starch
2 sprigs of spring onion for garnish 


Method:
  • Marinate the cut up chicken for 30 minutes or longer.
  • Mix flour, salt and pepper and add marinated chicken, juice discarded making sure chicken is all covered with flour.
  • Fry until crispy and golden in color, set aside.
  • Make the sauce by mixing all sauce ingredients add salt and pepper to taste let boil in low heat. Add corn starch dilluted in 1/4 cup of water stirring constantly until thick, set aside.
  • Strain and transfer sauce in a small container leaving 1 cup in deep pan putting the fried chicken back and let simmer until everything is all coated liberally.
  • Enjoy your orange chicken sprinkled with spring onion add sauce as you eat. Enjoy this simple and yet delicious recipe.


Friday, November 13, 2015

Spanish Bread


Spanish Bread is a soft and sweet bread filled with brown sugar, butter and breadcrumbs. Nobody knows why this is called Spanish bread and where this bread originated. As far as I know this is one famous bakery item that we loved and grew up with. I don't really mind where its origin was. I just want to bake and learn the way it is made. Learn with me, follow the simple recipe. 

Yeast is a simple ingredient yet important in this recipe. It makes this bread rise, it is a single celled, microscopic fungus that eats sugar as their food in order to foam. Yeast produces carbon dioxide or gas due to fermentation. The gas is responsible for the bread to rise thus giving the bread its good flavor and strengthens the dough as it develop its gluten. Source: finecooking.com


When yeast is not added on the bread, the bread is hard and flat and has no taste at all. You must understand how to handle yeast in order for it to perform well to its capacity to produce gas. The liquid you use for the yeast to foam be it plain water or milk must be warm about 105 to 110 degrees F. The yeast will die in a very hot liquid and will not activate in cold water also. So be very particular in handling your yeast in breadmaking. The same case with proofing the dough, it also need a warm environment to rise. I live in Saudi Arabia, the climate is hot so my dough is proofing just right on the counter top. I guess if you live in cold countries like Europe and America maybe that's the time you place your dough in a warm oven or microwave oven. 

Ingredients:
1 cup fresh milk (warm)
1 1/2 teaspoons rapid rise yeast
1 teaspoon sugar
4 to 41/2 cups bread flour
1/2 cup sugar
1/2 teaspoon salt
2 whole egg
1/2 cup melted butter

Filling:
3/4 cup softened butter
1/2 cup bread crumbs
3/4 cup brown sugar or white sugar
2 teaspoons vanilla

  • In a mixing bowl add yeast and 1 teaspoon sugar in warm milk, stir to dissolve and let stand for 5-10 minutes. Set aside. 
  • Combine sugar, butter, eggs and salt blend well then add to the yeast mixture. 
  • Add flour to the yeast mixture. 
  • Knead the dough on a lightly floured surface for about 10 to 15 minutes by hand or 5 to 7 minutes by electric mixer using the dough hook until dough is smooth & elastic and small bubbles appear.

Manual kneading
  • Transfer the dough to a greased bowl, cover with a damp cloth or cling film and let it rise in a warm place for 1 to 2 hours.
  • Punch dough to remove air and fold 3 to 4 times and let rest in the same bowl for 30 to 40 minutes, cover loosely with damp cloth or plastic cling.
  • Punch down
  • In a separate bowl prepare filling by mixing sugar butter and crumbs, set aside. 
  • Take out dough on a lightly floured surface form a ball and divide in 2 parts.

  • Roll each part like a log and cut 1 inch a piece, yields 12 pieces.

  • Flatten each piece using rolling pin and spread butter mixture, sprinkle bread crumbs. 
  • Roll up each filled dough and seal, roll it on bread crumbs. 
  • Arrange in prepared greased or lined cookie sheet and cover with damp cloth for 45 minutes to 1 hour for final proofing. 
  • Bake at 350 degrees F for 20 minutes. Enjoy this easy recipe.


Wednesday, November 11, 2015

Hot Pandesal

Pan de sal is a filipino bread rolls. It is originally called "salt bread" because the main ingredients are just salt, water and flour. It is usually eaten by filipinos during breakfast time although these days you can find sandwiches using pan de sal sold everywhere. This recipe is with milk variation to make sure the dough becomes soft and delicious. You must have breadcrumbs ready before making your pandesal. Sometimes I make my own by drying old breads inside the oven. There are times that it is available in the grocery stores which is very nice and convenient. 


Why I use milk in my pandesal? Fresh milk or powdered milk mixed in water makes the dough fluffier, creamier, rich in flavor and adds texture to the bread. Pan de sal with salt and water has a flat taste. 
Salt for your additional information is an ingredient that is mostly ignored in breadmaking. I'm guilty of that! Because we don't need a lot of this so I thought it's okay if it is omitted. What I do not know is that its role is to regulate yeast activity, adds taste and gives the bread long shelf life. It also helps in the oxidation  process, meaning it controls the rising of the dough. In my experience over risen dough makes the bread crumbly (breaking apart) and dry. I've also learned over the years that the best place to proof the dough is at room temperature. I have tried placing it inside the warm oven and inside the microwave oven too. The best choice is to leave it on the counter top and let it rise 1 to 2 hours. How do I know that my dough has reached its final rise? I poke it, when the hole stays in place, my dough is ready to be punched down then again to let it rest for like 30 minutes before I shape it.

Ingredients:
3/4 cup fresh milk (warm)           
1/2 teaspoons active dry yeast
1 teaspoon sugar
2 cups all purpose flour
2 tablespoons white sugar
2 tablespoons vegetable oil

1/4 teaspoon salt

1/2 cups bread crumbs
yields nine bread rolls

Method:
  • In a mixing bowl place warm milk, yeast and 1 teaspoon sugar. Let foam for 3 to 5 minutes.
  • When the yeast foams add flour, 2 tablespoons sugar, oil and salt mix and knead for 5 to 7 minutes by electric mixer and 10 to 15 minutes by hand.
  • Remove the dough and oil your mixing bowl, place the dough in it and coat the dough top and bottom with oil.
  •  Cover with a damp towel or plastic wrap and let sit in at room temperature until the dough has doubled in volume for 1 hour.
    Poke test
     Dough has reached its final rise
  • Punch down to remove air, let rest and loosely covered with a damp cloth for 30 minutes.
  • Punch again after resting and form as a log.
  • Cut the log into 9 equal parts.
  • Roll each piece in breadcrumbs.
  • Arrange them in your prepared pan, cut side up.
  • Let rise for 45 minutes to 1 hour.
  • Bake at 350 degrees F for 15 to 20 minutes.
Enjoy your homemade hot pandesal.

Sunday, November 8, 2015

Ginataang Langka (Young unripe jackfruit)


Ingredients:
3 kilos cleaned young langka
2 regular size coconut, grated and pureed with 1 cup of warm water, set aside (first extraction)
2 cups of warm water for (second extraction) 
Regular size ginger
3 sprigs of spring onion
1/4 pork fat
100 gms dried fish 


Method:
  • Cook langka with the second extraction of gata (puree) over high heat, when boiling set to medium heat until tender.
  • Add the sliced pork fat, sliced ginger and cut up spring onion.
  • When most tender set the heat to low, cook some more until gata (puree) becomes oily.
  • Add the dried fish.
  • Add the first extraction of gata (puree) set to high heat, let it boil then set to medium heat until creamy.
  • Adjust taste with salt and garnish with green chilli.

Jackfruit is the national fruit of Bangladesh and Indonesia, the origin is unknown, though it has flourished in many parts of the world but not very suitable in cold climate, it grows mostly in Asian countries such as India,Bangladesh, Sri Lanka,Thailand and Philippines.We love jackfruit especially when it's ripe, sweet and juicy. The dish I am going to share has always been the favorite of the whole family.
Freefarm.org
Jackfruit serves as an excellent protective agent against viral and bacterial infections due to the presence of Vitamin C. This fruit is known to strengthen the immune system by improving the condition of white blood cells. It is beneficial in eliminating cancer causing free radicals in the body and inhibiting the degeneration of cells. This fruit is a great source of fiber, this helps in avoiding constipation. It also protect against the colon mucus by eradicating carcinogenic chemicals from the large instestine, being an excellent source of vitamin A, it monitors health of the skin and eyes specifically by keeping vision related problems, like macular degeneration and night blindness. With simple sugars such as fructose and sucrose present in jackfruit, it is useful in boosting energy levels, without adding fat cholesterol to the body.
Magnesium is found in large amounts in jackfruit absorbs calcium in the body and contribute to strengthening of bones and prevention of bone related disorders like osteoporosis. Jackfruit plays a significant role in thyroid metabolism due to the presence of copper in their flesh thereby promoting hormone production and absorption. The potassium content is useful in lowering blood pressure thus, reducing the risk of heart attack and stroke. It's a heart friendly due to Vitamin B6 that reduces the levels of homocystein in the blood. It fulfills the iron needs in the body, thereby promoting proper blood circulation and preventing cases of anemia.With anti ageing properties, jackfruits are known to inhibit the degeneration of cells, thereby giving the consumer a younger, suppler and more glowing skin.www.foodofy.com


Laing Recipe (Taro Leaves)


Laing is a famous dish from Bicol region in the Philippines, basic ingredients are the taro (Gabi) leaves coconut milk, siling labuyo. One comment I heard is they say the spiciness of this chili variety is "suave" meaning not very spicy which I doubt. I know this type of chili, we have this planted in our backyard when I was young. Since  I am not a chili person, in my recipe I make it clear to be optional because my 12-year-old daughter loves this dish just don't add the chili. I use a chili sauce to get closer to its original taste. The fresh taro leaves are best to use which we can find in the Philippines with the real (gata) coconut milk but abroad, we usually find taro leaves dried, packed and weighed in grams. Coconut milk is in boxes (powdered) other ingredients are available in the supermarkets and groceries so variations are common in this recipe just to get the replica of the real Laing. 
Taro leaves
https://en.wikipedia.org
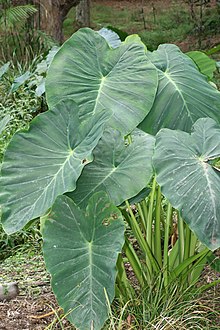
Taro leaves are commonly called Dahon ng Gabi in the Philippines. It is widely available throughout the country. It grows in swamp areas as well as on dry land. It has high in fiber content, vitamin E, potassium, manganese and vitamin B6. Low in cholesterol, carbohydrates, sodium and saturated fats. Laing is the famous dish that uses the taro leaves, which is this recipe is all about. 
The root which can be a good substitute for rice and mostly used like potatoes in a stew is used in a dish called sinigang that makes the soup starchy and gives the sinigang its delicious and unique taste. So we use dried taro leaves in this Laing dish, the fresh leaves are tedious to prepare and you have to fully understand how to handle the leaves to get rid of its toxin. 


Ingredients:
250 gms taro leaves
2 cups kakang gata or coconut puree
 chilli (optional)
3 cloves garlic minced
Regular size onion
Regular size ginger, minced
3 tablespoons oil
2 cups water
2 pieces crabs
1/2 kilo shrimp
salt to taste

Image credit:http\yummysupper.blogspot.com
Coconut Puree


Method of cooking:
  • Saute in hot oil the garlic, onion and minced ginger, until flavor comes out.
  • Add washed and drained taro leaves.
  • Add 1 to 2 cups of water, let it boil until taro is tender, about 15 to 20 minutes (taro absorbs water).
  • Add the crabs, remove the hard shell first and cut in half, add shrimps until cooked.
  • Add coconut milk and let simmer for at least 5 to 10 minutes until taro leaves are soaked with flavor and water has decreased.
  • Add salt to taste and your Laing dish is ready. 
  • Enjoy your Laing with fried fish and white steamed rice.


Wednesday, November 4, 2015

Loaf Bread


I love cooking and baking, I love to be in the kitchen. The result is so rewarding. I've wondered why do I bake bread? when there's a lot of bakeries with definitely good bread to choose from and without hassle. We consume a lot of bread by the way. We eat bread for breakfast, we pack sandwiches for school and work. We have bread for lunch and dinner basically this is our staple food aside from rice. Over time, I've learned the science of bread making. 
I've done and baked so much bread already. I know when the dough has been kneaded enough or not. 


My perfect loaf
I am proud to say I'm a baker now! This success means a lot to me. This is not one time try and Bam! Successful... I've had lots of failures in the past. I'm happy though that with my limited time at home I was able to learn many things not to mention the dishes I've washed, pans cleaned and ingredients wasted in the bins. 

When I step in the kitchen, with a recipe on hand, I want to come up with something, a baked bread or cake. If I realize that the ingredients are incomplete I would look for a substitute that's how my passion began in baking.


Let's get started.

Image credit:www.meijer.com
9x5


Yields 2 loaves
2 teaspoons yeast
2 cups warm milk1 teaspoon sugar
6 to 6 1/2 cups of bread flour
1/2 oil or butter
3/4 cup sugar
1/4 teaspoon salt


Method: 

  • Foam the yeast in a mixing bowl by combining three ingredients, milk, yeast and sugar for 3 to 5 minutes. 
  • Add in the flour, sugar, oil, and salt. 
  • Mix and knead by hand or with an electric mixer. 
  • Remove and form a ball, oil the mixing bowl, coat top, and bottom. 
  • Cover bowl with cling film, let rise until double in volume for 1 to 2 hours.

  • Punch down to remove air or fold it 3 times to rest. 
  • Cover loosely and let rise for 30 to 40 minutes. 
  • Divide dough in 2 equal parts. 
  • Form each piece like a log that will fit into the loaf pan.


  • Place in lightly greased loaf pan. 
  • Cover with damp cheesecloth or cling film and proof for the last time for 45 minutes to 1 hour. 
  • Bake at 350 degrees F for 40 minutes. 
  • Baked bread should have a hollow sound when tapped. Enjoy...

Nicely done